Visual Studies
|
|
Print this week first! More prints you create, the more options you will have to create your final themed works/series. Between printing continue to create the spaces for your box assemblage art. (Don't forget, you CAN use some of your decorative papers and prints with in your box.) 
It is a full work week! Take advantage of the time we have in studio to not only create but to start to piece together how you want to showcase your print pieces. Did you want to assemble them in a collage fashion? How about in layers? Would you want to piece them in boxes? Think about what and how you want your box pieces to fit in the spaces you created. How is the textures and collage areas fitting with the theme? Do you have enough items to fill the spaces you created? Think about the gaps and large vacant areas... you need to fill in spaces so the box feels full and complete. 
PRINT PRINT PRINT!!!! lets take this week to create some amazing prints in the different techniques you have learned and attempt to coordinate ideas with your theme in mind. You will have time to work on your boxes as well. All small pieces should be created this week so next week we can start to assemble items in your boxes. SKETCH out your placement and box in your journal.  
Lets take two days of the three to work on the boxes and one day to work on the printing. On one of the days, I will demonstrate how to use the gelli printing tools. Be creative in testing out the capabilities of the gelli and see how you will be able to work this in to your theme for printing and possibly your box. Because last week had so many different schedules this week we will have a mini session on the print artist here on the Big Island. 
Lets use a few pieces of pre-decorated paper that you created to do a few prints on. Once dry, use other materials to embellish the print in to a final art piece. Consider colors that you can print with to enhance the block print you created. This week the backgrounds for your box should be finished. NOW is the time to play with placement of objects and start to create pieces you can incorporate in your box. You have collected 5 items and will need to create 4 additional pieces to put in the assemblage of your box work. 
In Studio... Start working on your background of your boxes. What textures and colors are you planning on focusing on for your audience... remember to consider your voice and theme in your piece... this is about you! This week we will continue to refine our print blocks and learn about a local artist who is known for his wood block prints. Its a full work week so be prepared to have a mini one on one session with me to discuss how you plan to assemble your pieces in your box... I have other embellishments you can add to the over all look of your assemblage piece.  

We will finish off our triptych with your haiku and name and finished mounted work. Once you finish and post your triptych to your jamboard with your Haiku start to focus on your print work. Create a series of prints with your foam art prints using various colors and backgrounds. (use some of your decorated papers). Photograph your prints.
We will be working on Printing and your landscape watercolor painting. Lets work on your watercolor landscapes. We will be starting on our personal boxes and cutting our blocks as well. We will be introduced to tryptich type work and begin to transform your watercolor painting. 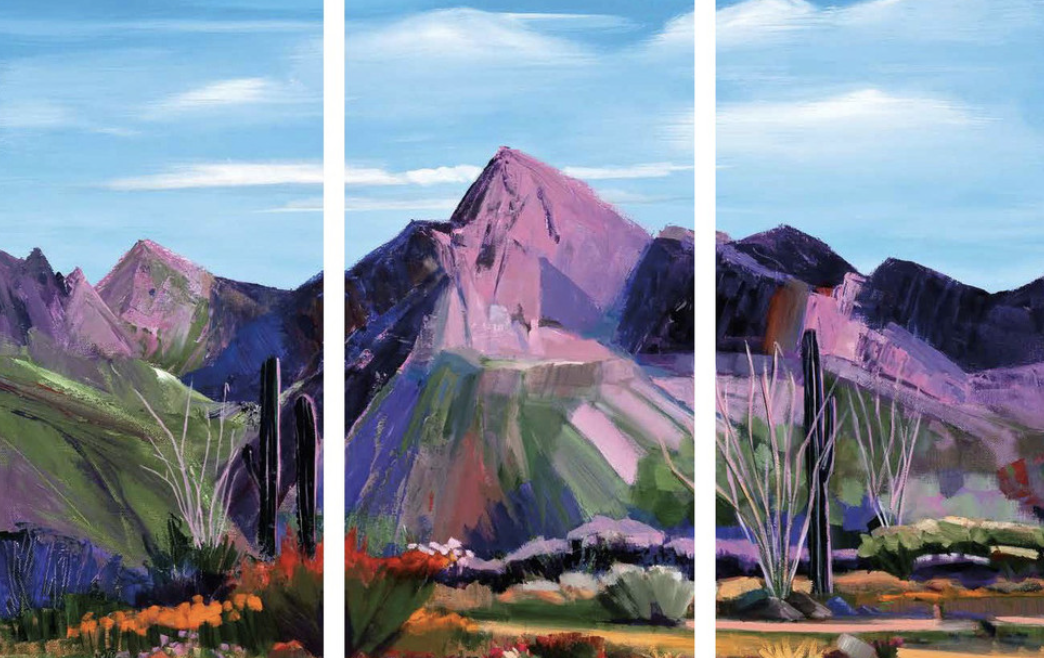 |
Archives
April 2024
Categories |
 RSS Feed
